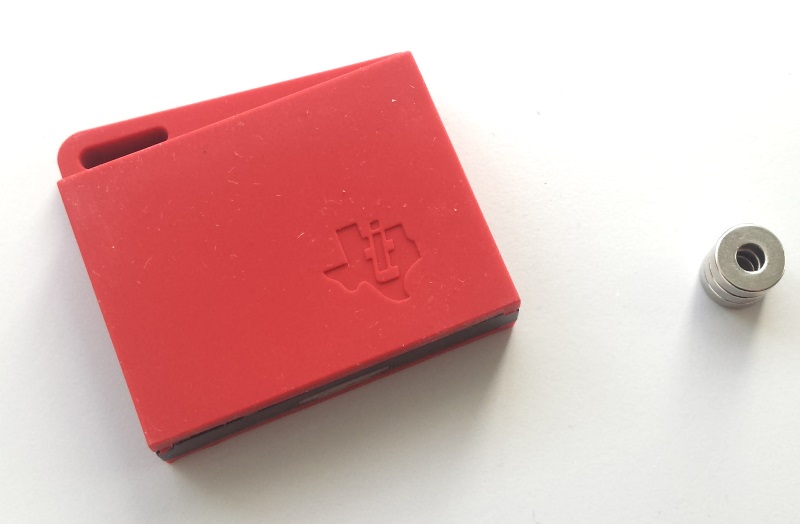
Today we set up a door sensor that sends a notification to your phone when the door is opened, no matter where in the world you are. Because we use the Thingsquare system and off-the-shelf hardware we do not need to do any programming or soldering.
The door sensor consists of one Sensortag and one ordinary magnet.
We use the Sensortag hardware with sub-GHz configuration. Unlike many projects using this hardware, we use IPv6 sub-GHz 6lowpan communication instead of Bluetooth.

The Thingsquare system uses 6lowpan instead of Bluetooth for several reasons:
- Longer range: 6lowpan’s sub-GHz radio signals travel much farther than Bluetooth’s 2.4 GHz signals – particularly indoors.
- Less interference: the 2.4 GHz Bluetooth frequency band is shared with WiFi, which typically is very crowded. Also, 2.4 GHz signals are effectively stopped by the human body, so performance is degraded when there are people around.
- Automatic meshing: with 6lowpan, we automatically get the benefits of meshing, which means that we can extend the range of our system indefinitely.
- Built-in low-power operation: we can achieve multi-year lifetime on a single coin-cell battery, while taking advantage of all the above benefits.

Hardware
- One stk" target="_blank">Sensortag (sub-GHz CC1350)
- One CC1350 Launchpad, as the serial gateway
- One Raspberry Pi, preferably model 3 or Zero W
- One magnet

Hardware: one Launchpad, one Sensortag, one magnet, one Raspberry Pi.
Step 0: Set up the Wireless Network
Follow the steps in this tutorial to set up the mesh network and flash the firmware onto the Sensortag.
Enable Remote Access for the Sensortag. This will allow you to immediately see updates from the Sensortag in the web browser and smartphone app, and is needed for push notifications to work.
Finally remove the red plastic casing of the Sensortag. This will allow the magnet to come closer to the magnetic sensor on the tag, to make it easier to detect.
Step 1: Test the Magnet
To make sure you have a strong enough magnet, we need to check that the Sensortag can detect it.
Place the magnet close to the lower left corner of the Sensortag as in the video below.
Did you know the sensortags have a magnetic sensor? Trigger with a magnet, see the result in the app https://t.co/pdiBOTmOfj #IoT #6lowpan pic.twitter.com/BNtYH6eSJI
— Thingsquare (@thingsqr) February 16, 2017
If the magnet is strong enough, a magnet icon will appear next to the Sensortag in the device list. The magnet icon can also be seen in the detailed view.
Step 2: Mount the Magnet and the Sensortag
We use invisible tape to set up the Sensortag and the magnet. This works best if we first remove the red plastic cover from the Sensortag.
The idea is to place the magnet on the door frame so that it aligns with the Sensortag when the door is closed. Make sure that the right corner of the Sensortag aligns with the magnet when the door is closed – see the pictures below.


We use invisible tape to mount the magnet on the door frame and the Sensortag on the door, so that they align when the door is closed. Perhaps not the most beautiful setup, but it works.
Step 3: Set up Push Notifications
We now set up push notifications that trigger when the magnet is detected by the sensor.
The Thingsquare app has ready-made support for push notifications when a magnet has been detected. All we need to do is install the app, to configure the correct trigger for the push notification, and update the message to one that we would like to see on our phone.

Set up a push notification that triggers when the magnet is detected – which means that the door is closed.
Tap the sensortag in the list of devices, then tap the Notifications button.
Tap the Magnet detected button in the list of notifications.
The default message is Magnet detected. Change this to Door was closed. Tap Add to enable the notification.
Now open the door and close it again. You should now get a notification on your phone saying that the door was closed.
You may add another notification for when the door was opened in the same way
as above. But use the Magnet removed notification instead.
Step 4: Open the Door
Open the door – and immediately see the result on your phone!

Open the door over and over and over and over again and see the push notifications on your phone.
You can now leave the door sensor in place and keep being notified when you are away.
Step 5: Long Live the Door Sensor!
Now that we have our door sensor up and running, we can make it live as long as possible on its coin cell battery. We do this in the Power Setup tab.
Tap the Power Setup button. Make sure that Power Mode is set to Lifetimeand select Reachability in Lifetime Mode to be 2 hours. Turn off Proximity Beacons to save more power. Change the Statistics gather period and Sensor sample period to something like 2 hours to squeeze a few extra months of the battery.

Turn down the power consumption to make the door sensor live for years on its battery.
Now you are all set up!
Bonus Step: See it on the Map
By default, all devices that generate a push notification are highlighted on the built-in map.
Tap Device Map to bring up the map view. To see the devices on the map, tap Select Devices, then select the devices to show.
Now open and close the door. This will cause the device to be highlighted with a circle.

Devices that trigger a push notification are highlighted on the map. Make sure to have selected the door sensor first.
 By Marcus Linderoth, Thingsquare VP of Engineering


